A standout farmers market booth setup doesn't happen on market day. It's built on a solid plan. Vendors who look effortlessly professional have merged a clear brand vision with a practical strategy. This foresight separates a stressful market day from a profitable one.
Your Booth Blueprint Before Market Day
To a customer, a great booth looks inviting. Behind the scenes, it’s a puzzle where every piece—from the tent legs to the price tags—is thoughtfully placed. This blueprint phase is about sketching out your plan to avoid day-of surprises. It's about knowing the rules, defining your brand, and setting a realistic budget.
Decode the Market Rules and Regulations
Before buying anything, your first move is to learn the market's rules. New vendors often show up with setups that violate regulations, and it's a tough spot to be in. Every market has its own set of guidelines.
Never assume a 10x10 foot canopy is the standard. Get the vendor handbook or check the market's website. You need answers to these key questions:
- Your Footprint: What are the exact dimensions of my space? Is it 10x10, 8x10, or something else?
- Tent Rules: Are there color restrictions? Do they require specific tent weights instead of stakes?
- Signage Policies: What’s the maximum size for banners? Where can they be hung?
- Product Display: Are there health department rules for displaying or storing food?
Knowing these details from the start saves you from last-minute changes and stress. Your entire plan depends on this foundation.
Define Your Booth’s Brand Theme
In a sea of white tents, your booth is your physical brand identity. A cohesive theme makes you memorable and turns your space into a destination. It’s the difference between being just another produce stall and being "the farm with the cool wooden crates."
A consistent brand theme builds trust. When customers see a well-thought-out presentation, they associate that professionalism with the quality of your products.
Think about the story you want to tell. Are you rustic and natural, using wood and burlap textures? Or are you bright and modern, with a minimalist design and a pop of color? For example, a jam maker might create a cozy "grandma's kitchen" vibe. A microgreens grower could go for a clean, vibrant look with a green and white palette to signal freshness.
Create a Practical Budget for Your Setup
Budgeting for your booth requires balance. It’s easy to get carried away, but a smart budget starts with essentials that impact sales and can withstand a busy season.
First, list every potential expense: canopy, tables, tablecloths, signage, and credit card processing fees. For a comprehensive starting point, this catering equipment checklist is a fantastic resource.
Next, divide that list into Must-Haves and Nice-to-Haves. A sturdy tent, clear pricing, and a secure cash box are must-haves. Custom tote bags or decorative floral arrangements are nice but can wait. This approach lets you launch a professional booth now and reinvest profits into upgrades later.
Designing a Booth That Draws a Crowd
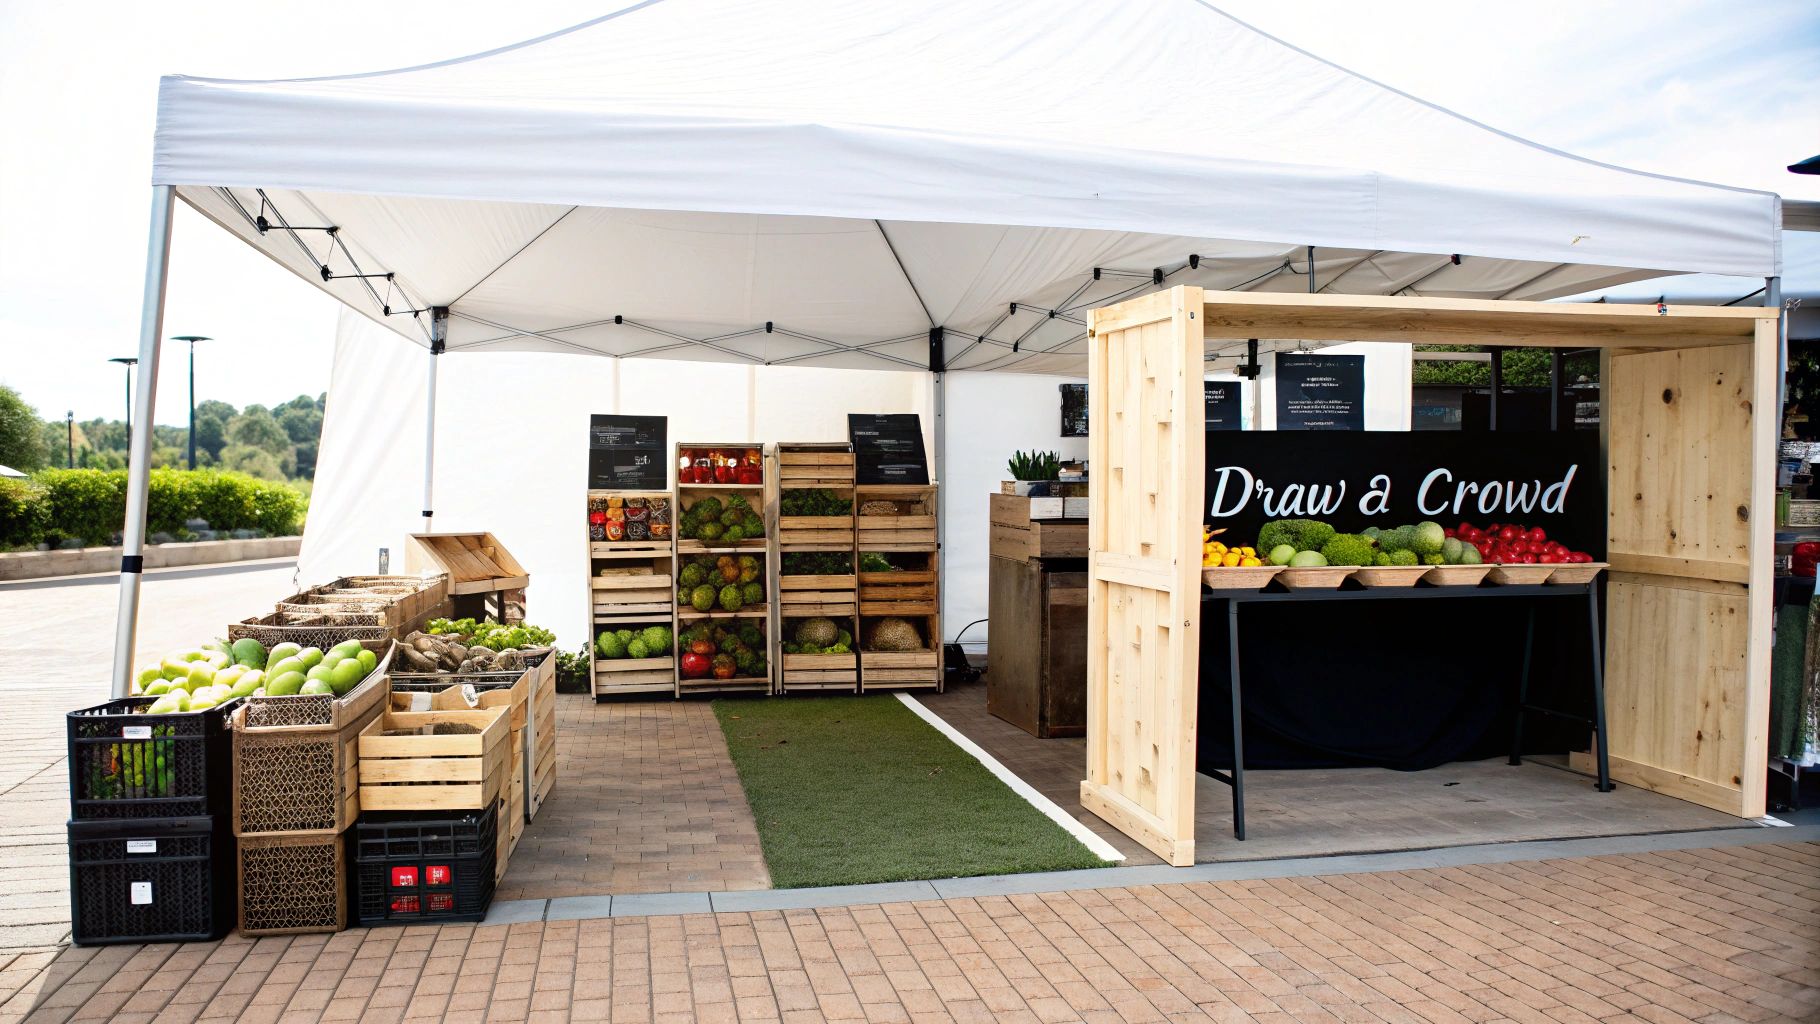
Your 10x10 foot space isn't just a stall; it's your storefront. Your mission is to turn it into a destination that pulls people in. This requires thinking like a retail designer, focusing on customer flow, visual appeal, and an atmosphere that makes shoppers stop, linger, and buy.
A well-designed farmers market booth setup is a powerful sales tool. With nearly 42 percent of Americans shopping at farmers markets, you have a massive audience. A great display grabs their attention, makes browsing easy, and triggers impulse buys. You can dig deeper into how displays impact sales with these insights on farmers market displays.
Crafting an Inviting Booth Layout
How customers move through your space is critical. You need a clear path that guides them from the aisle into your booth. The biggest mistake is a single table stretched across the front. It creates a barrier, keeping people at a distance.
Instead, create a layout that invites people in.
- The U-Shape: This classic layout works. Arrange three tables in a "U" to create a welcoming opening. Customers can step into your space, and you can engage with them from the center.
- The Aisle: Create a mini shopping aisle. Place two tables parallel to each other, encouraging people to walk through. This is effective in crowded markets because it directs shoppers past all your products before checkout.
Your layout should be an open door, not a fence. The goal is to get shoppers to cross from the main aisle into your personal retail space.
This simple shift in perspective can dramatically increase engagement.
Using Vertical Space and Visual Merchandising
A flat table is a boring table. To create a lush, abundant look, you have to think vertically. Adding height makes your products more visible from down the aisle and lets you display more inventory in a small footprint.
Create levels and visual interest that draw the eye. It's easier than it sounds.
- Wooden Crates: Stack them or turn them on their sides for instant, rustic shelving.
- Tiered Stands: These are perfect for smaller items like jams, soaps, or baked goods.
- Simple Shelving: A small, portable bookshelf can be a game-changer, adding vertical display space.
Color and texture are your secret weapons. A dark tablecloth makes colorful produce and labels pop. Burlap adds a warm, natural feel, while a crisp white cloth creates a clean, modern vibe. For more ideas, check out these creative outdoor vendor booth ideas. The goal is to create a beautiful backdrop that makes your products the star.
Choosing Your Essential Market Gear
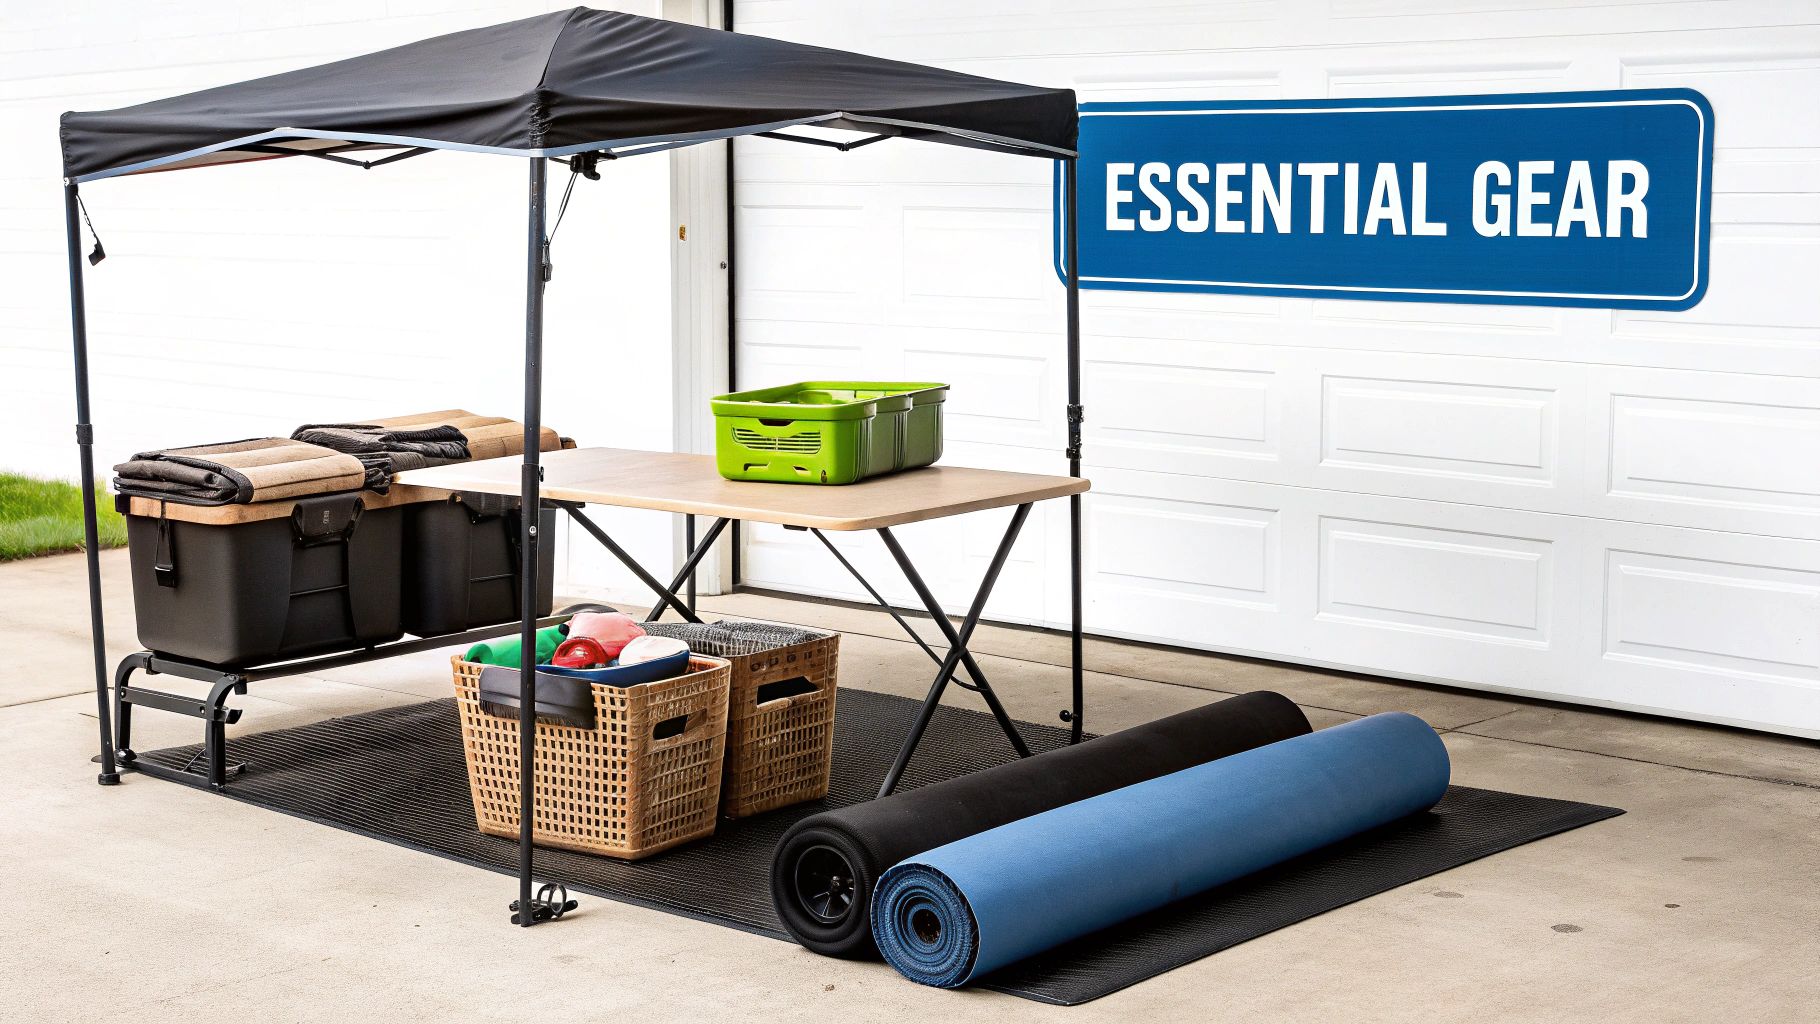
The right gear can make or break your market day. Durable, practical equipment means a smooth, profitable day, not a chaotic one. Investing in quality gear isn't just about looking professional—it’s about making your life easier from setup to teardown. Here's a no-fluff guide to the tools you actually need.
Your canopy is your most important piece of equipment. It's your roof, billboard, and shelter. Don't cheap out. Get a commercial-grade steel frame that won't blow away in the wind. The fabric should be heavy-duty and UV-resistant to protect you and your products.
Flimsy canopies are a common struggle, especially when market rules don't allow stakes. This problem is so widespread that design competitions have been held to create more stable pop-up canopies for vendors.
The Foundation: Tables and Your Own Comfort
Your tables are the stage for your products. They should be sturdy enough to hold everything but light enough for you to set up alone. Folding plastic tables are popular because they're portable and easy to clean.
But a great table doesn't matter if you're miserable. Standing on hard surfaces for hours is brutal. An anti-fatigue mat is a non-negotiable game-changer. It will save your back and feet, keeping you energized all day.
Your physical comfort directly impacts your sales. If you're tired and sore, customers notice. An anti-fatigue mat is a small investment in your stamina.
Displays and Merchandising That Sell
With the basic structure in place, it's time to make your products look irresistible. This is where creative displays come in. The goal is to avoid a flat, boring table.
- Baskets and Bins: Use a variety of baskets and bins to group products and add rustic charm. Find unique, affordable options at secondhand stores.
- Risers and Crates: Create different height levels on your tables. Simple wooden crates or dedicated risers are perfect. Height makes your booth look fuller and more eye-catching.
Good display shelves for craft shows are another excellent way to use vertical space, which is critical in a 10x10 footprint.
Checkout and Food Safety
Finally, you need a smooth payment process. A reliable system that takes both cash and cards is a must. Have a secure cash box and a fully charged card reader (like Square or Clover). Nothing is worse than losing a sale to failed tech.
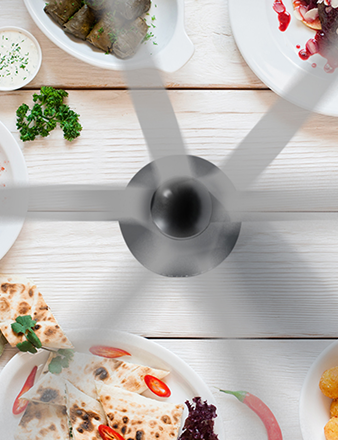
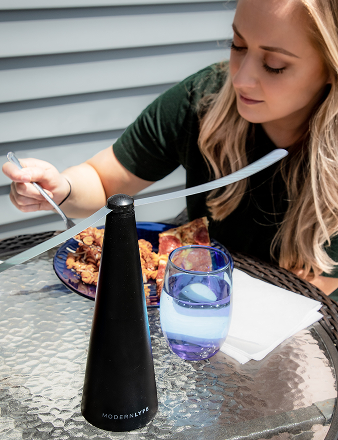
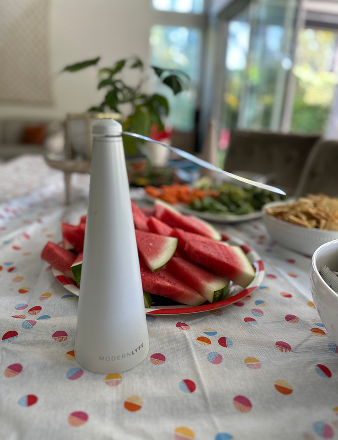
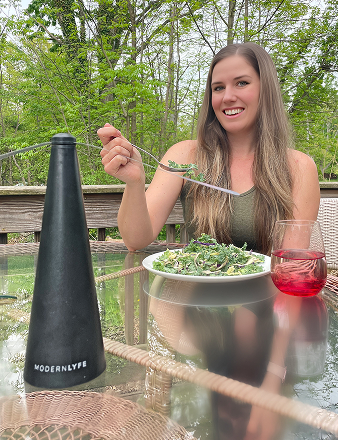
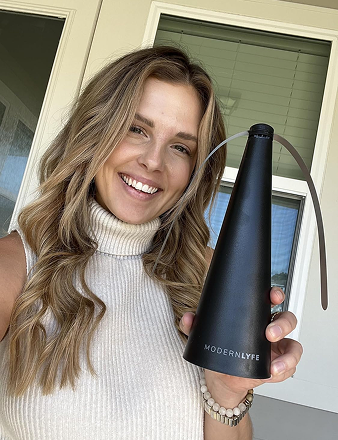
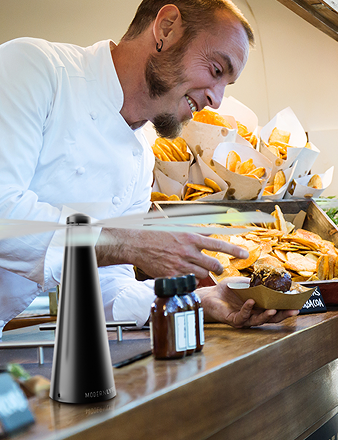
If you’re selling food, hygiene is everything. Protecting products from pests is crucial for health standards and customer trust. A simple fly cover for food shows you care. You can find more info on that here: https://modernlyfe.com/blogs/articles/fly-cover-for-food. It's a small detail that builds major confidence.
Starting from scratch is overwhelming. Use this checklist to prioritize your shopping list.
Essential Farmers Market Booth Equipment Checklist
This table breaks down the must-have gear, what to look for, and its priority level for new vendors.
| Equipment Item | Key Feature to Look For | Priority Level (High/Medium/Low) |
|---|---|---|
| 10x10 Canopy Tent | Commercial-grade steel frame, UV-resistant fabric | High |
| Folding Tables (2-3) | Lightweight, sturdy, easy to clean | High |
| Anti-Fatigue Mat | Thick cushioning, non-slip bottom | High |
| Secure Cash Box | Lockable, with compartments for bills/coins | High |
| Card Reader | Reliable brand (e.g., Square), long battery life | High |
| Folding Chair | Comfortable, lightweight, and portable | Medium |
| Display Risers/Crates | Varied heights, sturdy construction | Medium |
| Product Signage | Clear pricing, easy-to-read font | Medium |
| Tablecloths | Floor-length, durable fabric | Medium |
| Canopy Weights (4) | At least 40 lbs per leg | High |
| Baskets & Bins | Variety of sizes and materials for texture | Low |
| Cooler with Ice Packs | For drinks, snacks, or temperature-sensitive items | Low |
| Business Banner | Professional printing, clear branding | Low |
This checklist covers the foundational pieces you'll rely on week after week. Start with "High" priority items and add the others as your budget allows.
Building a Brand People Remember
Think of your booth as a physical storefront—a slice of your brand people can see, touch, and experience. In a crowded market, a memorable brand pulls people back week after week. It’s not just what you sell; it’s the story you tell with your entire presentation.
A strong brand identity turns your space from just another stall into a destination. When your farmers market booth setup looks consistent and professional, it builds instant recognition and trust.
Start with Striking Signage
Your signage is your first handshake with a customer. It must be big, bold, and easy to read from across the aisle. A large, well-designed banner with your business name isn't just nice—it's essential.
Clarity is key. Forget fancy fonts. Use a clean, legible typeface with a high-contrast color scheme that pops. Your goal is to make your name stick.
Equally important are your price signs. Every item needs a clear, easy-to-read price tag. If a customer has to ask for the price, you’ve created friction that can kill a sale. Make shopping effortless.
Tell a Story with Product Descriptions
Your signs can do more than list prices; they can be silent salespeople. Use them to explain what makes your products special. Instead of a sign that says "Tomatoes," try "Juicy, Sun-Ripened Heirloom Tomatoes."
A few well-chosen words can reframe how a customer sees your product. Notice how these descriptions change the perception:
- 'Small-Batch Strawberry Jam' suggests a homemade, high-quality product.
- 'Spicy Microgreens Mix' gives shoppers a clear idea of the flavor profile.
- 'Pasture-Raised Eggs' highlights ethical farming and superior quality.
This small effort helps people understand the value you’re offering and justifies your pricing.
Weave Your Brand Colors into Everything
Color is a powerful tool for brand recognition. Pick one or two main colors and use them consistently across your booth. This simple strategy creates a cohesive, professional look that stands out.
A unified color scheme makes your booth instantly recognizable. When a repeat customer scans the market for your signature blue tablecloth, they've found you without reading your sign.
Apply your brand colors to all key elements. A colored tablecloth is a great start. Also consider your packaging, your apron, or even small decorative props. If you give away promotional items, they should feature your branding. For ideas, check out these 15 tips for choosing the best promotional products. These details work together to create a polished brand experience people remember.
Mastering Your Setup and Teardown Workflow
A smooth, profitable market day is the result of an efficient workflow. The secret to a stress-free experience isn't just your display; it’s mastering the logistics of your farmers market booth setup and teardown. A streamlined process saves energy, reduces stress, and gets you home faster.
It starts before you leave your driveway. How you pack your vehicle makes all the difference. Use a "first-in, last-out" packing strategy. The items you need first—your canopy, weights, and tables—should be the last things you load, making them the first things you unload.
The Assembly Sequence That Works
Once you've unloaded, follow the same assembly order every time. When it's early and you're not fully awake, muscle memory is your best friend.
- Canopy First: Get the canopy up and secured with weights immediately. This defines your workspace and provides shelter.
- Build the Bones: Arrange your tables and large shelving units. This is the skeleton of your booth.
- Add Your Brand's Skin: Put on your tablecloths and hang your main banner. This step instantly creates a professional look.
- The Final Flourish: Start placing your products. Begin with the largest items to anchor the display, then fill in with smaller details and price signs.
This flow builds your booth from the outside in, turning a chaotic task into a calm, repeatable process.
This visual guide breaks down the essential branding elements—Signage, Colors, and Pricing—that truly make a booth memorable.

As you can see, these three components are designed to work together, creating a polished and professional look that customers will start to recognize and seek out week after week.
Your Market Day Toolkit
Never leave for a market without a dedicated toolkit. This small box of essentials has saved me more times than I can count.
Your toolkit is your insurance policy against the unexpected. A single zip tie can be the difference between a broken display and a successful market day.
Stock your kit with these lifesavers:
- Fasteners: Zip ties, clamps of various sizes, and bungee cords.
- Tools: Scissors, a utility knife, and a small rubber mallet.
- Quick Fixes: Duct tape and extra rope.
- Business Essentials: Extra price tags, pens, and a backup battery for your phone or payment processor.
Having this kit on hand turns a wobbly sign or a ripped tablecloth into a minor fix, not a disaster.
The Art of the Quick Teardown
When the market closes, your goal is a quick, organized exit. The trick is to reverse your setup process. Clear your products first, then pack away displays and branding. The last things to come down are your tables and canopy.
Packing up neatly makes setting up for your next market that much easier.
It also helps to know the landscape. The average U.S. farmers market hosts around 39 vendors, so space and time are tight during setup and teardown. With vendor fees averaging about $13 per day, an efficient process is essential to maximize your return. Get a better feel for the big picture by checking out these farmers market trends.
Common Booth Setup Questions Answered
Even with a detailed plan, market day can be unpredictable. Here’s how to stay flexible and keep your farmers market booth setup looking professional, no matter what happens.
How Do I Prepare My Booth For Wind And Rain
Weather is a major factor. Wind can turn a canopy into a kite. The best defense is 40 pounds of weight on each canopy leg.
You can buy commercial weights or make your own by filling PVC pipes with concrete or sturdy buckets with sand.
Never rely on stakes in asphalt. Most markets prohibit it, and they don't hold well.
Your top priorities are safety and product protection. A weighted tent and waterproof storage will save your setup from sudden showers or strong gusts.
Angle your canopy for rainwater runoff. Keep clear plastic tarps or vinyl sheets in your kit to quickly cover tables and protect products without hiding your display.
What Are My Options For Power
Electricity is a luxury at most markets. If you need power for lights, scales, or a cooler, plan to bring your own.
Here are reliable options:
- Portable Power Stations: Battery packs like Jackery or Goal Zero run quietly and can power devices for hours.
- Deep Cycle Marine Battery: Paired with an inverter, this creates a robust DIY power source.
- Battery-Operated Gear: Choosing battery-powered lights, scales, and card readers can eliminate the need for a central power source.
Always check with the market manager. Some locations offer power for a fee, but spots are limited and fill up fast.
How Can I Make My 10x10 Booth Feel Bigger
A 10x10 foot footprint can feel small, but a few design tricks can open up the space.
Ditch the front-facing table. Instead, use a U-shape layout to invite customers inside.
Go vertical. Elevate products on crates, tiered shelves, or table risers. This draws the eye upward, frees up table space, and makes the booth feel larger.
Use a consistent color scheme and clear signage to create a clean, organized look. Add a welcome mat or keep a side open to create an inviting flow.
Ready to create a welcoming, pest-free zone for your customers? The fly fans from MODERN LYFE keep food displays fresh and guests happy at any market or outdoor event. Explore their selection at https://modernlyfe.com.