A 1 inch pipe clamp is more than a piece of hardware—it's your key to a solid mounting point for anything from commercial kitchen gear to industrial fixtures. These clamps are engineered to grip a pipe with a 1-inch outer diameter, giving you a stable foundation for your project. Success comes down to picking the right material, style, and load capacity for the job.
What Is a 1 Inch Pipe Clamp?
You'll see "1 inch pipe clamp" used as a catch-all term, but this category covers a huge range of clamps designed for different environments and tasks. Grabbing the wrong one can lead to rust, slippage, or even total failure.
To avoid problems, think beyond the size. The first and most critical question is: where will this clamp be used? An indoor coffee shop has different needs than an outdoor patio bar exposed to humidity and rain.
Material and Environment Matter
The clamp's material determines its lifespan and suitability. A basic zinc-plated steel clamp works fine for indoor projects, like hanging lightweight signs or securing conduit in a dry basement. The zinc coating offers just enough protection against rust in a controlled environment.
But take that clamp outside, and you’re asking for trouble. Moisture will cause it to rust quickly, weakening the clamp and leaving ugly stains. For any outdoor or damp application—like mounting a Modern Lyfe fly fan on a restaurant patio—stainless steel is the only choice. It delivers superior corrosion resistance, ensuring a secure hold that performs well and looks good for years.
For a deeper dive, check out a complete guide to 1-inch pipe materials that breaks down all the options.
Use this quick-reference table to compare common clamp materials.
Quick Guide to 1 Inch Pipe Clamp Materials
| Material | Corrosion Resistance | Best For | Example Use Case |
|---|---|---|---|
| Stainless Steel | Excellent | Outdoor, humid, or corrosive environments | Mounting a fly fan on a restaurant patio |
| Zinc-Plated Steel | Fair | Dry, indoor applications | Securing conduit or light fixtures inside a building |
| Galvanized Steel | Good | Damp indoor or some sheltered outdoor areas | Hanging pipes in a basement or under a covered porch |
| Copper-Plated | Poor (Aesthetic) | Copper pipe systems (prevents galvanic corrosion) | Plumbing and decorative indoor copper pipe installations |
Matching the material to the environment is your first step toward a successful, long-lasting installation.
Matching Clamp Style to The Job
Once you’ve chosen a material, consider the clamp’s design. The style directly impacts its function. You'll commonly encounter a few types:
- U-Bolts: These provide a tight, 360-degree grip. They are ideal for anything subject to heavy vibration.
- Split Ring Hangers: Perfect for suspending pipes from a ceiling, their design allows for easy vertical adjustments after installation.
- Cushioned Clamps: Lined with rubber or neoprene, these clamps protect the pipe’s finish and absorb vibrations.
This infographic shows how these factors connect.

The process is simple: start with the material, pick a style that fits the task, and you’ll find the perfect clamp.
Don't Forget Load Capacity A common mistake is focusing only on the "1 inch" size and ignoring the clamp's weight limit. Always check the manufacturer's load capacity to ensure it can safely support your equipment with a healthy safety margin.
For example, hanging a 5 lb fly fan is completely different from securing a 50 lb piece of kitchen equipment. Always double-check the specs before you buy to prevent major problems.
How to Install a Pipe Clamp Correctly

When mounting anything overhead, especially moving equipment like a Modern Lyfe fly fan, a "good enough" installation won’t cut it. A secure 1 inch pipe clamp isn't just about holding something up; it's about ensuring it stays put. Getting this right from the start provides true peace of mind.
Everything depends on what you're mounting to. If your mounting surface is flimsy, the entire setup is compromised.
Pick the Right Mounting Surface
Whenever possible, anchor into solid wood beams or metal frames. A ceiling joist, wood stud, or sturdy metal purlin gives your fasteners something substantial to bite into. This is always your safest and best option.
Of course, ideal surfaces aren't always available. If drywall is your only option, mounting directly into it is a recipe for disaster. However, you can do it safely with the right anchors.
- Toggle Bolts: These are the best choice for overhead loads. The wings expand behind the drywall, spreading the load across a wider area.
- Molly Bolts: For lighter-duty jobs, these expanding metal anchors create a firm grip inside the wall cavity.
Matching the anchor to the wall is the first step to a professional-grade installation.
A 5 lb fan exerts far more force when it's running and vibrating. Always over-engineer your setup and plan for more weight than you think you need.
Achieve the Perfect Fit and Tightness
With your mounting location sorted, it's time to attach the clamp. A little precision here goes a long way.
Pre-drilling pilot holes is non-negotiable. For wood, use a drill bit slightly smaller than the screw's diameter. This creates a powerful grip without splitting the wood. For metal, use a bit sized for your fastener and add a drop of cutting oil to make drilling easier.
Your fasteners are just as important as the clamp. Ensure they're rated for the load and appropriate for the surface.
- Wood Beams: Use heavy-duty lag screws. Their coarse threads are made for locking into wood.
- Metal Frames: Use self-tapping metal screws or, for maximum security, machine bolts with nuts and washers.
- Drywall Anchors: Use the screws that came with your toggle or molly bolts—they are engineered to work together.
When tightening the clamp around the pipe, the rule is "snug, plus a quarter turn." You want it tight enough to prevent slipping but not so tight that you deform the clamp or strip the threads. Over-tightening is a leading cause of clamp failure because it creates a weak point that can give way under stress. Use a hand tool to feel the resistance and know when to stop.
Common Uses for 1-Inch Pipe Clamps

The real magic of a 1 inch pipe clamp is how it solves real-world problems. These workhorses are invaluable for event planners, restaurant owners, and anyone needing to mount gear without drilling permanent holes. They provide a solid, reliable way to mount equipment exactly where you need it.
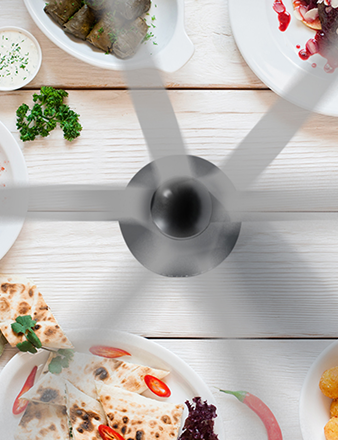
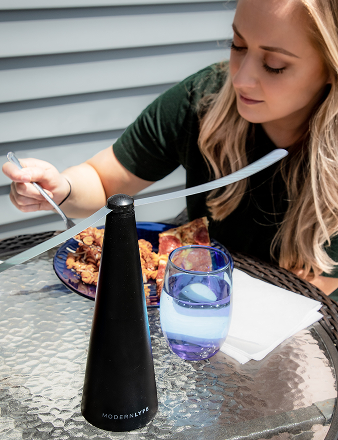
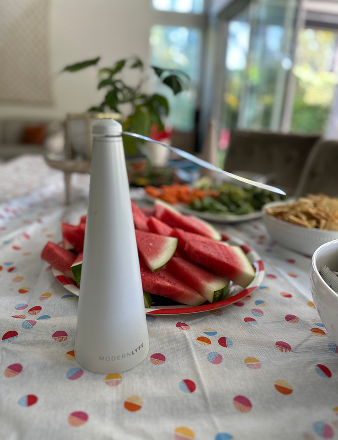
A perfect example is mounting Modern Lyfe fly fans. At an outdoor event, flies can ruin the atmosphere around the buffet. With a few 1 inch pipe clamps, you can quickly attach fly fans to tent support poles, creating an invisible air barrier that keeps food displays pest-free.
Top Spots for Mounting Fly Fans
Placement is everything. The goal is to keep flies away without blowing napkins off tables or bothering guests.
- Restaurant Patios: Use stainless steel clamps to mount fans overhead on pergolas or awning frames. This keeps them out of the way while providing great coverage.
- Catered Events: For temporary setups, clamp fans directly onto tent poles or portable scaffolding to create "no-fly zones" over the dessert table, bar, or buffet line.
- Food Trucks: Protect your service window. A couple of clamps on the awning frame can hold fans in the perfect spot to guard the food prep area and your customers.
Pro Tip: Manage your cords from the start. Use zip ties or hook-and-loop straps to run the power cord cleanly along the pipe. This prevents a messy look and tripping hazards. For more tips on keeping spaces pest-free, see our guide on the benefits of using a fly fan.
More Than Just Fans: Other Smart Clamp Uses
Once you start using these clamps, you'll find opportunities everywhere. Their strength and simplicity make them a fantastic tool for all sorts of mounting jobs.
Use them to create the right atmosphere for an evening event:
- Secure String Lights: Fasten string lights to a pergola or patio frame. The clamps prevent sagging and shifting in the wind.
- Mount Small Speakers: Add music by attaching lightweight Bluetooth speakers to tent poles or deck railings for even sound distribution without leaving a single screw hole.
- Hang Temporary Signs: Quickly put up directions for a pop-up market or a welcome sign for a festival.
The principle is always the same: create a solid connection. It’s the same logic you’d apply to a bigger job, like mounting a TV on a wall. Whether it's a small fan or a large screen, the goal is a firm grip on a solid anchor point, and that's exactly what these clamps deliver.
Maintaining Your Clamps and Troubleshooting

Your 1 inch pipe clamp is installed, but the job isn't done. A little upkeep ensures your setup remains safe and secure for years. Don't just set it and forget it.
Think of it as a quick health check for your hardware. A visual inspection every few months, especially for clamps exposed to the elements or vibration, can catch a small problem before it becomes a big one.
A Quick Health Check for Your Clamps
A solid inspection only takes a minute. You’re just looking for anything that seems off.
Here’s a simple checklist:
- Give It a Wiggle: Gently but firmly try to move the clamp and the equipment. There should be zero give or play. Vibrations or temperature shifts can cause fasteners to loosen.
- Hunt for Corrosion: Scan the clamp, screws, and nuts for any rust or discoloration. Pay extra attention to spots where water might sit or the coating was scratched during installation.
- Check for Stress: Look for physical signs of wear. Are there any new bends in the metal? Are the screw heads stripped? This is critical for clamps holding heavy gear.
Since rust is the enemy of outdoor hardware, it’s worth knowing how to protect metal from rust. For any clamp that isn’t stainless or galvanized, a protective spray can make a big difference.
Fixing Issues Quickly
Even with a perfect installation, things can happen. Most common clamp issues are an easy fix if you catch them early.
If a clamp comes loose, simply retighten the fasteners to that "snug plus a quarter-turn" sweet spot. Resist the urge to crank on it—over-tightening can strip the threads or warp the clamp.
When to Replace, Not Repair If you see deep rust, a bent frame, or screws that just spin, it’s time for a replacement. A new clamp is cheap insurance for your equipment and your peace of mind.
For example, if you stripped a screw head during setup, don't try to jury-rig it. The clamp's integrity is compromised. The only safe move is to carefully remove it and install a fresh one.
Fine-Tuning for Load, Torque, and Vibration
Once you have the basics down, you can dial in your installation. Securing equipment like a Modern Lyfe fly fan professionally means considering three key factors: the total weight it supports (load), how tight the bolts are (torque), and keeping everything quiet (vibration). This takes a project from "done" to "done right."
It's easy to focus only on the fan's static weight, but you also have to account for dynamic load—the extra force created when the motor is running. A 5-pound fan can put much more stress on its mount when in motion. A good rule of thumb is to choose a 1 inch pipe clamp with a load capacity at least double the static weight of the item you're hanging.
Why Torque Matters
After accounting for load, getting the clamping force perfect is the next step. This is where torque comes in. Using a torque wrench is the only way to do it right, as it eliminates all guesswork.
Without one, you risk:
- Too loose: The clamp will slip, creating a serious safety hazard for anything mounted overhead.
- Too tight: This is just as bad. You can crush the pipe, strip the bolt threads, or cause stress fractures in the clamp that lead to failure.
A torque wrench is a small investment that protects your gear and ensures the connection is solid without damaging any components.
Taming Vibration for a Silent, Secure Hold
Vibration is the enemy of any mounted fixture with a motor. It can cause an annoying hum and slowly work fasteners loose over time. You can see how critical airflow is in our article on the basics of a 100 CFM blower, where vibration is also a factor.
Fortunately, there’s an easy fix. When installing your 1 inch pipe clamp, add a small layer of dampening material to isolate the fan from the pipe.
My Go-To Trick: Keep high-density neoprene padding on hand. Cut a small strip and place it inside the clamp before tightening. A simple rubber insert also works well. This cushion absorbs micro-vibrations, keeping things quiet and ensuring bolts never vibrate loose.
By thinking through load, using precise torque, and controlling vibration, you're not just hanging a fan—you're engineering a solution that’s secure, silent, and built to last.
Frequently Asked Questions About 1 Inch Pipe Clamps
When working with pipe clamps, the same questions tend to pop up. Here are straight answers to help you get the job done right.
Can I Use a 1 Inch Pipe Clamp on a Different Sized Pipe?
The short answer is no. A 1 inch pipe clamp is made specifically for a pipe with a 1-inch outer diameter.
If you clamp it onto a smaller pipe, it will never get a proper grip and is almost guaranteed to slip, especially with any vibration.
Forcing it onto a larger pipe is just as bad. You’ll likely strip the threads, bend the clamp, or damage the pipe. Always match your clamp size to your pipe’s outer diameter. It's the only way to ensure a secure fit.
What Is the Typical Weight Limit?
There's no single answer. The load capacity of a 1 inch pipe clamp depends entirely on its material, style, and manufacturer.
Here's a general guideline:
- Standard-duty steel clamps: Typically used for lighter tasks like running conduit, these can handle around 50-100 lbs.
- Heavy-duty U-bolts or forged hangers: Built for serious work, these can often support several hundred pounds and are used for demanding structural jobs.
Always check the manufacturer's load rating before you install anything overhead. Never guess. Exceeding the stated capacity is a risk you can't afford to take.
How Do I Prevent Rust on Outdoor Clamps?
When installing a 1 inch pipe clamp outdoors, rust is a structural failure waiting to happen. The best prevention is choosing the right material from the start.
For any exterior project, stainless steel is the top choice. Look for grades like 304 or 316 for superior corrosion resistance. Hot-dip galvanized steel is another solid, long-lasting option.
Avoid standard zinc-plated clamps for outdoor use. The thin coating isn't designed to withstand constant moisture and will rust quickly.
Ready to find the perfect clamp for your next project? MODERN LYFE offers a range of high-quality mounting solutions designed for reliability and ease of use. Discover the right hardware for your needs at https://modernlyfe.com.