A cable usually fails at the worst time. Not during setup. During service, when a patio is full, a buffet line is open, or an outdoor event is already running late.
A lot of those failures start at one sharp metal edge. The wire passes through a panel, frame, or housing without proper protection. Vibration does the rest. Add moisture, UV, cleaning spray, and constant handling, and a cheap shortcut turns into a dead fan, a damaged controller, or a service call nobody wanted.
That is where a 1 inch rubber grommet earns its keep. It is a small part, but in hospitality work, small parts decide whether equipment survives a season or gets replaced early.
Why Your Grommet Choice Matters in Hospitality
Outdoor hospitality setups are rough on wiring. Cables get routed through powder-coated frames, thin metal housings, table bases, and temporary event structures. They sit in sun, then dew, then cleaning splash, then storage bins. Generic advice for desks or home walls does not cover that.
Many product pages still under-explain how to choose grommets for these hybrid conditions, especially where fan or lighting cables pass through metal and face moisture or cleaning agents. That gap matters for outdoor fly fan setups because a poorly specified grommet can let water in and damage battery packs or controllers, as noted in this overview of rubber grommet selection gaps for hospitality-style environments (https://www.dangoodbuy.com/collections/rubber-grommets-inner-diameter-under-1).
Small hardware, expensive consequences
A missing or wrong grommet creates three problems fast:
- Cable wear: The panel edge rubs insulation every time the unit vibrates or gets moved.
- Moisture exposure: A loose fit leaves a path for water and grime.
- Presentation problems: Guests may never name the hardware issue, but they notice messy cable routing and patched repairs.
In hotel and restaurant operations, equipment protection is tied to sanitation and appearance too. If wiring runs through service furniture, patio enclosures, or buffet hardware, clean cable routing supports a more controlled setup. That practical mindset fits with broader food-service housekeeping standards discussed at https://modernlyfe.com/blogs/articles/food-service-hygiene-standards.
Hospitality needs a different standard
A facilities team does not buy a grommet just to fill a hole. The part has to do four jobs at once:
- Protect the cable jacket
- Hold in thin sheet metal
- Tolerate weather and cleaning
- Stay put when equipment vibrates
Tip: If the setup lives outdoors or gets wiped down daily, treat the grommet as a protective seal component, not trim.
For crews that manage multiple accessory types, this broader Contractor Guide to Cable Management Accessories is useful because it places grommets in the larger context of cable protection, routing, and retention. That is the right way to think about them in hospitality. As one part of a system, not a last-minute add-on.
How to Measure for a Perfect Grommet Fit
The most common mistake is simple. People hear “1 inch rubber grommet” and assume the panel hole should be 1 inch.
That is not what the name refers to. In a standard 1 inch rubber grommet, the inside diameter is 1 inch (25.4mm), the groove diameter is 1-1/4 inches (31.8mm), and the outside diameter is 1-1/2 inches (38mm). Those standard dimensions let it fit a 1-1/4-inch panel hole while protecting the cable, according to Rubber Feet Warehouse (https://www.rubberfeetwarehouse.com/products/1-inside-diameter-rubber-grommet-fits-1-1-4-panel-holes-1-4-gw).

The four dimensions that matter
If you only measure one thing, you will probably order the wrong part. Check all four.
-
Inside diameter
This is the opening that the cable, cord, or hose passes through. In this case, it is 1 inch.
-
Groove diameter
This is the critical number for the panel hole. The hole must match the groove, not the inside diameter.
-
Outside diameter
This tells you how much flange coverage you get around the hole. It matters when the panel edge is rough or the opening is in a visible area.
-
Groove width
This must match the panel thickness closely enough for the grommet to seat and stay retained.
A quick measuring routine that works
For maintenance teams, this is the cleanest approach:
- Measure the cable bundle first. Do not size the grommet around one wire if a connector or sleeve also has to pass through.
- Measure the panel hole if it already exists. Use calipers if you have them. If not, use a drill gauge or compare against known bit sizes.
- Measure panel thickness. Thin hospitality housings and brackets vary more than people think.
- Check the path. A cable that enters straight can use a tighter fit than one that bends hard immediately after the panel.
Good field habits beat guesswork
If the grommet goes into a fan housing, battery box, or metal pedestal, order a couple of test sizes rather than forcing one “close enough” option onto every application. That saves more time than reworking holes later.
Key takeaway: In grommet sizing, the named size tells you the passage opening. The groove diameter tells you the hole you need.
If the cable routing is part of a power distribution setup, it also helps to review the full equipment path, not just the panel opening. This practical reference on accessory planning around a https://modernlyfe.com/blogs/articles/10-outlet-power-strip is useful for spotting pinch points, clutter, and poor strain relief before the install starts.
Choosing the Best Grommet Material for Your Environment
Most installation problems get blamed on size. In hospitality, material choice is just as important.
A grommet that works fine in a dry back-office cabinet may fail early on a patio host stand, outdoor bar station, or mobile event rig. Sun, rinse-down cleaning, vibration, and battery equipment all change what “good enough” looks like.

What matters in the field
For hospitality equipment like fly fans, Neoprene (50-60A durometer) offers significantly better ozone resistance than SBR and demonstrates high success rates in extended UV tests, making it a strong outdoor choice. SBR does better with vibration, retaining 98% integrity under 10G RMS vibration common in fan motors, according to Marco Rubber (https://www.marcorubber.com/rubber-grommets.htm).
Those numbers point to a practical trade-off. Some jobs are weather-first. Others are vibration-first.
Grommet Material Comparison for Hospitality Use
| Material | Best For | UV Resistance | Chemical Resistance | Temperature Range |
|---|---|---|---|---|
| Neoprene | Outdoor equipment, patio fixtures, exposed fan housings | Strong for outdoor use | Good for general service | Broad enough for typical hospitality use |
| SBR | Vibration-prone equipment, fan motor applications | Lower than neoprene | General purpose | Suited to standard service conditions |
| Silicone | Hot zones and flexible sealing needs | Good in many outdoor settings | Varies by exposure | Strong choice where heat matters |
| PVC | Light-duty indoor cable protection | Better indoors | Moderate in lighter-duty use | Better for less demanding setups |
| Nylon | Mechanical durability and some chemical-heavy settings | Application-dependent | Strong in many demanding applications | Better where mechanical wear is a concern |
A simple selection filter
Instead of shopping by price first, ask these questions:
-
Will this sit in direct sun?
Lean toward neoprene when outdoor exposure is steady. -
Does the equipment vibrate every day?
SBR makes sense where motor vibration is the main threat. -
Will staff clean around it with spray chemicals?
Move away from bargain rubber with vague material labeling. -
Is the opening visible to guests?
Choose a material that stays flexible and keeps a clean edge, rather than hardening and shrinking.
What works and what does not
What works:
- Matching the material to the environment
- Keeping one outdoor standard for repeated installs
- Buying from suppliers that clearly list dimensions and compound type
What does not:
- Using indoor trim grommets outside
- Mixing random compounds across identical equipment
- Choosing the cheapest part when the cable leads to a battery pack, controller, or motor
If your team also sources brackets, clamps, and related hardware, a good catalog of fasteners and fittings helps you keep the full assembly consistent. That matters because a properly chosen grommet can still fail early if the cable is tugging against a loose clamp or badly supported mount nearby.
Tip: Standardize one material for outdoor hospitality gear and one for indoor vibration-heavy gear. That makes replacement faster and cuts ordering mistakes.
A Step-by-Step Guide to Flawless Grommet Installation
A clean install is not complicated, but it does punish sloppy work. Most failures come from the hole, not the grommet.
For thin-metal panels like fan enclosures, the panel hole should be drilled to the exact groove diameter, often 1.19 to 1.25 inches for this class of grommet. Using a step drill bit to reach that size generally results in effective watertight sealing, while oversized holes create a poor compression fit and early cable abrasion, according to RubberMill (https://rubbermill.com/products/molded-parts/rubber-grommets/).

Start with the panel, not the part
Before the grommet comes out of the bag, inspect the mounting surface.
Thin sheet metal on portable hospitality equipment often has burrs, paint buildup, or slight distortion around old holes. If you install into that without prep, the rubber can tear during insertion or sit twisted and loose.
Use this sequence:
- Mark the exact hole size: Work from the groove diameter, not the inside diameter.
- Drill cleanly: A step bit usually leaves a neater opening in thin metal than a standard twist bit.
- Deburr both sides: Front and back edges matter.
- Check for wobble: If the panel flexes too much, support it before pressing the grommet in.
Match the panel thickness
This is the second place crews get burned. A grommet can be the right diameter and still be wrong for the panel.
The groove width has to suit the metal thickness. If the panel is too thick, the grommet will fight you and distort. If the panel is too thin, the part may spin or walk out during use.
A gap gauge or calipers help, but even a careful comparison against known sheet stock can tell you whether you are in the right range before you start forcing parts.
Tip: If a grommet requires brute force on a thin metal panel, stop. Either the hole size, panel thickness, or edge finish is wrong.
Press it in the right way
Once the hole is clean and confirmed, install with control.
Hand pressure works on some panels. On tighter fits, a large socket can act as a press tool and spread force evenly across the flange. Push one side of the groove into the hole first, then work around the perimeter until the grommet snaps into place.
If the fit is tight, use a small amount of silicone spray. Avoid greasy products that attract dirt or soften surrounding finishes.
Here is a visual demo for insertion technique and fit awareness:
Final checks that separate a pro install from a rushed one
After the grommet is seated, do not stop there.
Check these points:
- Flange seating: The outer lip should sit flush all the way around.
- Cable path: The wire should pass through without sharp bending at the edge.
- Retention: Twist the grommet lightly. It should feel seated, not sloppy.
- Panel condition: No fresh tearing, scraping, or rolled metal around the opening.
For heavier routed assemblies, pairing the opening with proper support hardware matters too. If the run continues along a frame or bracket, this practical reference on the https://modernlyfe.com/blogs/articles/1-inch-pipe-clamp is a good reminder that edge protection and cable restraint should work together.
Where installers usually go wrong
The bad habits are predictable:
- Drilling the hole by eye
- Skipping deburring because “the rubber will cover it”
- Hammering the grommet in
- Pulling a cable through at an angle that torts the bore
- Assuming a universal 1 inch part fits every 1 inch application
That last mistake causes the most rework. A 1 inch rubber grommet is a category, not a guarantee. The exact groove geometry and panel match still decide whether the install lasts.
Fixing Common Grommet Installation Problems
Most bad installs are fixable. A common mistake is assuming the grommet itself is defective before checking the panel, edge, and fit.
The grommet feels loose
This usually points to an oversized hole. The part may go in easily, but it will not compress enough to stay put under movement.
What to do:
- Remove it and measure the hole accurately
- Check whether paint, rust removal, or previous rework enlarged the opening
- Replace the panel section or use a correctly sized part if the hole no longer matches your intended groove diameter
A loose grommet is not a cosmetic issue. It lets the cable ride against metal and defeats the whole reason the part is there.
The grommet will not seat fully
If one side pops in and the other keeps rolling out, look at the edge condition and panel thickness first.
Common causes include:
- Sharp burrs: They catch and slice the groove.
- Wrong panel thickness: The groove cannot grab correctly.
- Distorted opening: The hole is not perfectly round.
In practice, deburring solves more of these problems than extra force ever will.

The grommet splits during installation
A split usually means one of two things. The panel edge is too sharp, or the installer forced the part into a hole that is too small or uneven.
Do not reuse a split grommet on equipment you care about. Replace it, then correct the root problem first.
Key takeaway: Rubber does not hide bad metalwork. It exposes it.
The cable still rubs after installation
This surprises people, but it happens. The grommet is in place, yet the cable still drags hard on one side.
That usually means the routing is wrong, not the grommet.
Fix it by checking:
- Entry angle: The cable may approach from too sharp an angle.
- Tension: Nearby clamps or ties may be pulling the wire sideways.
- Bundle size: The opening may be technically correct, but too crowded in actual use.
A better troubleshooting mindset
Do not ask, “How do I make this grommet work?” Ask, “What is the panel asking this part to do?”
That shift catches problems faster. In hospitality setups, the part is dealing with motion, weather, cleaning, and repeated handling. If one of those conditions is being ignored, the install will keep failing until the surrounding setup gets corrected.
Beyond the Basics Pro Tips for Hospitality Setups
The best grommet installs disappear into the setup. Guests do not notice them. Staff do not fight them. Equipment keeps working.
Patio table cable routing
A common field problem is routing low-voltage wiring through a metal table frame or umbrella opening without leaving loose cable exposed near guests. The cleanest approach is to protect every edge transition, not just the final exit point.
One grommet at the visible hole is not enough if the cable also passes through an internal bracket or lower frame opening. Protect each contact point. That keeps the outer jacket intact when staff drag tables for resets or event turns.
Outdoor host stands and service stations
Temporary outdoor stations often mix power, charging leads, and accessory wiring in one compact footprint. In those setups, separate abrasion protection from cable bundling.
Use the grommet to protect the pass-through. Use clamps, ties, or channels to manage movement after the cable exits. When teams expect the grommet to do both jobs, the cable starts levering against the panel and the fit loosens over time.
Battery housings and mobile event gear
Portable equipment gets stacked, loaded, and unpacked constantly. That is different from a fixed installation.
For mobile gear, build a quick inspection habit into setup and strike:
- Press-test the flange: Make sure it still sits flush.
- Look for hardening or cracks: Outdoor storage and sun exposure show up here first.
- Check cable drag marks: Shiny wear on one side usually means routing tension.
Tip: Keep a small kit with spare grommets, a deburring tool, calipers, and a step bit. That solves most field issues without a return trip to the shop.
Clean finishes matter
A 1 inch rubber grommet also helps visually. It turns a raw drilled hole into a finished opening. That matters on guest-facing equipment, buffet fixtures, and patio hardware where rough cable exits make the whole setup look improvised.
Unused holes are another opportunity. Blind grommets or hole plugs can close off abandoned openings cleanly and keep dirt out of older equipment enclosures. It is a small upgrade, but it makes repairs look intentional instead of patched together.
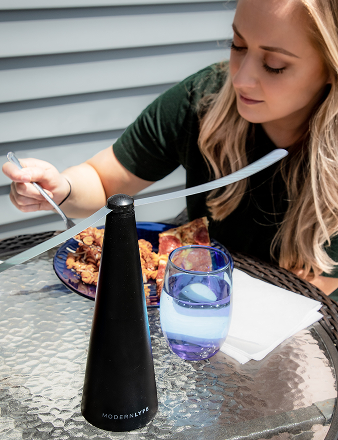
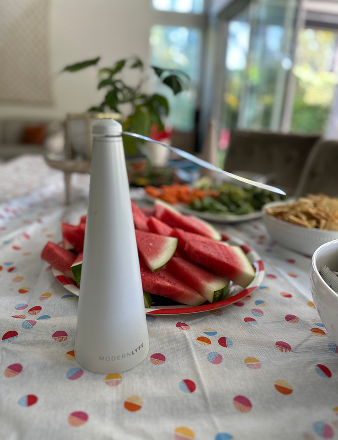
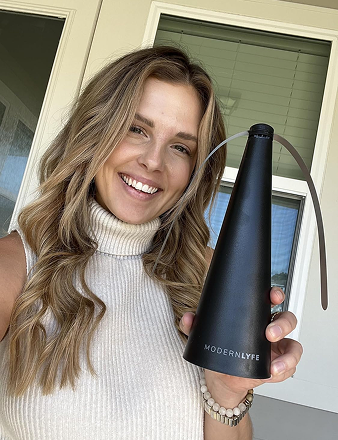
If you want outdoor fly protection equipment built for dining and event environments, MODERN LYFE offers battery-operated fly fans designed to keep food service setups cleaner, sharper, and easier to manage.