If you're standing under a ceiling fan before brunch, or looking up at a box fan that's been running all week in a crowded room, you probably already know the problem. The blades don't just collect dust, they collect the whole room, including kitchen grease, pollen, and whatever's floating around a busy dining space. A fan can look fine from across the room and still be dirty enough to send debris back onto tables, plates, and glassware.
That's why how to clean fan blades is really a hygiene job, not a cosmetic one. The right method keeps dust out of the air, protects the motor and finish, and makes the fan look guest-ready instead of just “mostly clean.”
Why Fan Blades Get Dirtier Than You Think
A Saturday-night buffet line tells the story fast. The room is reset, the linen looks sharp, and then someone looks up and sees a ceiling fan with a dull gray edge on every blade. That fan has been moving air all evening, which means it's been collecting more than dust. It's pulling in airborne particles, kitchen aerosol, and pollen, then holding them on the leading edge until heat and repeated use turn the buildup into a sticky film.
The fan is moving air, and the air is moving dirt
The reason blades look worse than they should is simple. A running fan doesn't just circulate air, it helps airborne debris settle on surfaces that catch it. In food-service spaces, that includes fine grease from cooking, dust from vents, and the kind of light residue that sticks to painted or glossy finishes. Once that layer builds up, it stops looking like “a little dust” and starts looking like neglect.
A clean fan and a fan that only looks clean are two different things.
That difference matters in a room with guests. A shiny blade over a buffet can still shed particles if it hasn't been wiped top and bottom, and the underside is often where buildup gets missed first. The same issue shows up in hotels, event spaces, and backyard setups. A fan that's been ignored doesn't just lose performance, it also changes the feel of the room.
Hygiene, airflow, and the fan itself
Cleaning fan blades isn't decorative work. It's part of keeping a space sanitary and comfortable, especially where food sits exposed. Heavy buildup can make the fan look tired, and it can also make the blades harder to wipe later because grime sticks more firmly over time. The practical reality is that regular cleaning preserves both appearance and function, which is exactly what busy spaces need.
Safety and Prep Before You Touch Any Fan
Start with power, not a cloth. Turn the fan off at the wall switch or breaker, and wait until the blades stop completely before you get close enough to clean them. For portable units, unplug them first and make sure they can't tip while you're working.

Build the five-minute prep routine
For ceiling fans, lay a drop cloth or towel under the work area so loosened dust doesn't land on serviceware, chairs, or buffet displays. For tabletop or fly fans, clear nearby plates, napkins, garnish trays, and glassware before you touch the unit. Keep your cloths and cleaner away from open food, because overspray and drips don't belong anywhere near a serving line.
- Power down first: Use the switch, breaker, or unplug the unit before cleaning.
- Wait for a full stop: Don't reach for spinning blades, even if they're moving slowly.
- Gather the right tools: Keep a microfiber cloth, a soft brush, and a mild cleaner close by.
- Protect the area: Use a drop cloth, towel, or tray cover to catch dust before it spreads.
- Keep liquid on the cloth: Apply cleaner to the cloth, not directly to the fan, because moisture can damage the motor or electrical parts.
That last rule matters more than many expect. Home-improvement and consumer guidance consistently warns against spraying liquid straight onto a fan, because moisture can creep into the motor or housing. The safer move is controlled application on a cloth, then a dry wipe afterward if needed, especially around any electrical component. That's the simplest way to protect the equipment and keep the cleaning job from turning into a repair issue.
Cleaning Ceiling Fan Blades Without Spreading Dust
A ceiling fan over a dining room table is where the mess becomes visible fastest. Dust falls, but not if you catch it first. The pillowcase method works because it traps loosened debris instead of letting it drift back into the room, which is exactly what you want in a furnished or food-adjacent space.

Use capture first, wipe second
Slide a clean pillowcase over one blade at a time and pull it back slowly so the dust stays inside the fabric. Then wipe both the top and bottom of the blade with a microfiber cloth. That top-and-bottom pass matters because dust doesn't settle evenly, and the underside often holds the grime that gets missed during quick cleaning.
If the blade has greasy buildup, switch to a lightly damp cloth with a diluted cleaner. A 50/50 vinegar-water mix or mild dish soap on microfiber is a common, practical choice for this kind of job, but the cloth should be only lightly damp, never wet. Heavy pressure isn't helpful either. Consumer guidance warns that pressing too hard can bend blades, and bent blades are a nuisance you'll feel later as wobble or noise.
Finish with drying and a quick inspection
Let the blades dry completely before turning the fan back on. Damp surfaces attract fresh dust, which means a rushed restart can undo part of the work. If the fan has a light kit or a housing that collects dust, wipe that area too, because grime there can drop back onto the blades and make the next cleaning harder. The whole process is quick when the buildup is light, and that's the point. Regular maintenance keeps the job simple.
Dry blades stay cleaner longer, and they're less likely to pull fresh dust right back out of the air.
Cleaning Box and Pedestal Fan Blades Safely
Box fans and pedestal fans are easier to reach, but they bring their own problems. Grills trap dust, screws loosen, and the inside cavity can hide enough debris to blow it right back into the room if you skip the interior. These fans need a more complete cleanup than a quick surface wipe.
Learn more about a compact box fan setup
Disassemble without forcing anything
Disconnect power first, then remove the front and rear grills with the correct screwdriver head. Don't force the clips or overtighten anything on the way back in, because cracked plastic and stripped screws create rattles later. Once the grills are off, vacuum or brush out the motor cavity before you touch the blades themselves.
Wash removable grills in warm water with mild dish soap, then let them dry fully. For the blades, use a microfiber cloth dampened with soap solution, not a dripping cloth. If you're dealing with stubborn residue around the hub, a lint-free cloth with 90%+ isopropyl alcohol can help clear it without soaking the unit.
Reassemble in the right order
Dry every part before putting it back together, including the grills and the inside edges of the housing. Moisture trapped near the motor can lead to corrosion, dust clumping, or a fan that sounds off even after cleaning. Refit the rear grill first, then the blade, then the front grill, and test the fan once everything is secure.
Common mistakes are easy to spot. An overtightened grill screw, an abrasive pad that scratches the housing, or a missed pocket of moisture can all turn a simple cleaning into a repair issue. The fan should spin smoothly, without rattling or a new wobble, before it goes back into service.
Cleaning Modern Lyfe Fly Fans and Other Battery Units
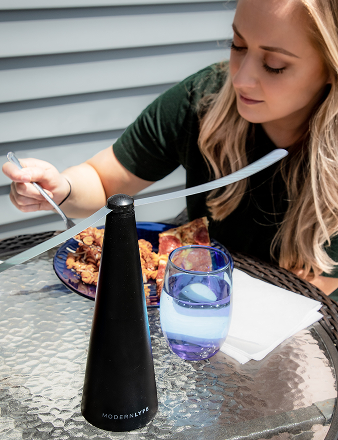
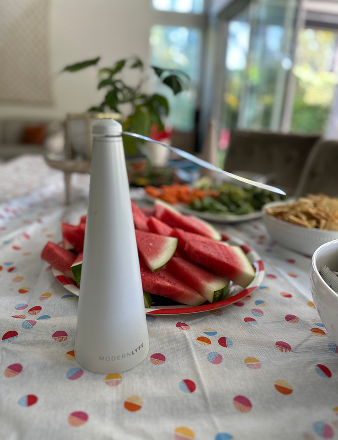
Battery-operated fly fans live right where the guest experience happens, on buffet lines, bar tops, and outdoor tables. That makes them different from ceiling or box fans, because the cleaning has to be gentle, food-aware, and careful around electronics. A fan in this category isn't just working in the background, it's sitting within arm's reach of plates, glassware, and service items.

Keep moisture away from the battery compartment
Wipe the soft blades with a barely damp microfiber cloth, then use a dry soft brush on the protective grille. Don't let liquid reach the battery compartment or charging contacts, and don't soak the surface just because the unit looks dusty. A light touch protects the finish and the electronics, which is exactly what you want from a small fan that gets moved from table to table.
The practical rule in food-service is simple, the fan has to be clean enough for guests to trust it and dry enough to sit near food. That means no residue, no drips, and no cleaner smell lingering on the table after setup. If you need a cleaner, keep it food-safe and wipe away any remaining film before the unit goes back into rotation.
Treat it like guest-facing equipment
For portable fan units, gentle care preserves both appearance and function. Avoid rough scrubbing, and don't pry at the grille or housing unless the manufacturer's routine cleaning guidance calls for it. If the unit is registered and kept within normal care standards, warranty support stays much easier to manage later. A fly fan can be technically clean and still not be ready for guests. Guest-ready means it looks intentional, feels dry, and doesn't draw attention away from the table.
Choosing the Right Cleaning Agents and Tools
The fastest way to make fan cleaning messy is to use the wrong product for the wrong surface. Dust wants a dry capture tool, kitchen grease needs a mild cleaner, and electronics-adjacent surfaces need a careful, low-moisture approach. A simple kit handles almost everything: microfiber cloths, a soft-bristle brush, a vacuum with a brush attachment, compressed air for tight spaces, mild dish soap, white vinegar, and 90%+ isopropyl alcohol for residue near non-porous parts.
If you're comparing safer products for home and hospitality cleaning, it also helps to look at choosing eco-friendly home cleaners and match the cleaner to the surface instead of the other way around.
Match the tool to the fan
| Fan Type | Primary Cleaning Agent | Best Tool | Avoid |
|---|---|---|---|
| Ceiling fan blades | Diluted vinegar-water mix or mild dish soap | Microfiber cloth, pillowcase | Spraying directly on the fan, soaking the blade |
| Box and pedestal fan blades | Mild dish soap or 90%+ isopropyl alcohol for residue | Microfiber cloth, vacuum brush attachment, soft brush | Abrasive pads, forcing grills, wetting the motor area |
| Battery fly fans | Barely damp cloth, residue-free wipe if needed | Microfiber cloth, dry soft brush | Moisture near batteries or charging contacts |
| Greasy kitchen-adjacent blades | Mild dish soap | Microfiber cloth, soft brush | Bleach, abrasive powders, overspray into the room |
Choose by what's on the blade
Dry dust responds best to capture tools first, not more liquid. Grease needs a mild soap solution, especially on fans near kitchens or buffet prep zones. Outdoor pollen usually comes off with a microfiber cloth or soft brush before any damp wipe is needed.
Practical rule: start dry, move to damp only if the residue stays behind, and keep the cleaner on the cloth.
Bleach on painted blades is a bad bet, and spray-on products create airborne mist that doesn't belong around food. That's why the kit stays simple and the process stays controlled. Less product, applied better, usually gives the cleanest result.
Maintenance Schedule, Troubleshooting, and Warranty Care
A fan stays presentable when cleaning becomes part of routine service, not a special project. Light dusting every 1 to 2 weeks and a deeper clean every 1 to 3 months is the practical cadence in the guidance, with more frequent attention for kitchen-adjacent or outdoor units. The reason is straightforward, less buildup means less dust drops during service, and less buildup also means less scrubbing later.

Fix the common post-cleaning issues fast
If a fan rattles after reassembly, check for a loose grill, a misaligned blade, or a screw that didn't seat properly. If it wobbles, stop using it until the blade or housing is seated correctly, because continuing to run it only makes the problem louder. A lingering odor usually points to residue left behind on the cloth, a damp part that wasn't fully dried, or cleaner trapped near plastic components.
Reduced airflow is often the simplest issue to diagnose. Dust may still be trapped in the grille, in the motor cavity, or on the underside of a blade where the first wipe missed. A fan that smells clean but moves air poorly usually needs a second pass, not a new product.
For troubleshooting details on battery units and other portable fans, the most useful habit is to keep the manual handy and use the manufacturer's support path before disassembling anything beyond routine cleaning. That matters for warranty-friendly care, especially if harsh chemicals or force could void support later.
- Listen for changes: New grinding, wobble, or humming after cleaning usually means something is loose or out of alignment.
- Check the dry-down: If a fan was restarted too soon, moisture can pull fresh dust back onto the surface.
- Protect stored units: Remove batteries from storage units to avoid leaks and corrosion.
- Keep cleaning gentle: Avoid strong solvents unless the manufacturer specifically allows them.
Review troubleshooting guidance for portable fan care
Clean fans don't stay clean by accident. They stay clean because someone built a short routine, used the right tool, and kept water away from the parts that hate it. If you're managing dining rooms, events, or a crowded home setup, make fan cleaning part of the reset, not the afterthought, so the next guest sees a space that looks as controlled as it feels.
MODERN LYFE builds battery-operated fly fans that fit the same high-standard cleaning routine described here, with a design that works in restaurants, hotels, catering setups, and outdoor gatherings. If you want a cleaner table presentation and a fan that's easy to keep guest-ready, visit MODERN LYFE and explore the options that fit your space.