You're standing on an empty lawn before load-in, and the site already tells you where the event will succeed or fail. Shade stops at the edge of the seating area, wind catches the far corner, a delivery truck can't reach the catering position without crossing guest pathways, and the nearest restroom is farther away than the site map suggests. That's outdoor event planning in its real form. The details that look minor during a quiet walk become highly visible once guests are waiting in queues, holding plates, searching for shade, or trying to hear a speech.
Outdoor formats demand more than a weather check and a tent quote. They combine site selection, permits, vendor sequencing, guest comfort, food safety, accessibility, emergency planning, and active on-site monitoring. The UK outdoor events sector has been estimated at at least £25 billion annually, making it the largest component of the country's £61.6 billion events industry, according to research on the value of the UK outdoor events industry. Treat the category with the operational discipline it deserves.
Start with What Outdoor Event Planning Really Covers
Begin with a site walk before you discuss décor. Walk the property at the same time of day as the event, note where shade falls, identify exposed corners, listen for nearby noise, and mark every route a truck, staff member, and guest will use. You're not admiring the venue. You're finding the points where friction will appear.
Outdoor event planning covers the full chain of decisions:
- Site assessment: Record ground conditions, drainage, access, utilities, overhead obstructions, shade, wind exposure, and nearby activity.
- Approvals: Confirm venue permission, local permits, food-service requirements, alcohol permissions, fire controls, noise rules, and traffic arrangements.
- Layout: Place arrival, registration, bars, food, seating, restrooms, first aid, waste, entertainment, and service access so they don't compete for the same space.
- Vendor coordination: Give every supplier a load-in window, marked position, power plan, water plan, waste responsibility, and contact person.
- Guest comfort: Design for shade, airflow, hydration, temperature changes, insects, queue time, lighting, and seating choices.
- Safety and accessibility: Keep pathways stable, routes clear, exits visible, and service vehicles separate from guest movement.
- Weather backup: Decide in advance what conditions trigger a tent inspection, activity pause, relocation, or cancellation.
Practical rule: If a decision affects guests, vendors, or emergency access, put it on paper before event day.
Indoor venues hide many problems inside walls and fixed infrastructure. Outdoors, the buffet line, bar queue, entrance, dining area, and restroom route remain exposed throughout the event. A fly landing on uncovered food, a sunlit queue with no shade, or a poorly lit path can damage the experience without creating a dramatic emergency.
Use a written site plan and a shared run sheet, then compare them during the walk-through. This outdoor event setup guide can help you build the practical foundation, but your own site inspection must drive the final decisions. The right question isn't “Does this look good?” It's “What will guests and staff have to tolerate here for several hours?”
Read the Site Before You Sign Anything
A venue can look spacious and still be operationally cramped. Start by drawing the guest route, then add every non-guest route around it. Trucks need to unload without crossing a queue. Caterers need a service aisle that doesn't cut through dining. AV needs safe access to power without running cables across the main walking path.
For capacity, use the planning allowances that fit the event format. One independent outdoor event guide recommends 40 to 60 square feet per person for standing or walking festivals and 15 to 20 square feet per person for seated events. Use those figures as a layout benchmark, then test the result against actual circulation, food service, emergency access, furniture, and vendor staging needs. The figures come from this outdoor festival planning guide.
Site Capacity and Ground Rules
| Event Format | Sq Ft Per Guest | Staking Required | Slope Tolerance | Notes |
|---|---|---|---|---|
| Standing or walking festival | 40 to 60 | Depends on structures | Gentle, even grades preferred | Allow room for circulation, queues, and service access |
| Seated event | 15 to 20 | Depends on structures | Level ground preferred | Include tables, chairs, dining routes, and accessible seating |
| Temporary structure zone | Add to event layout | Confirm with rental and local authorities | Must support safe installation | Check anchoring method, utilities, and overhead clearance |
Then inspect the ground itself. A slope can help drainage, but an awkward grade creates unstable tables, difficult wheelchair movement, and unsafe dance-floor placement. Surface type determines whether tents can be staked normally. Tree roots, irrigation lines, buried utilities, and hardscape can prevent staking altogether, so confirm underground conditions before a rental company arrives with equipment.
Look up as well as down. Branches, cables, lighting infrastructure, and low structures can restrict rigging and tent placement. Track the sun from guest arrival through dinner, not just at the time you visit. A seating area that feels comfortable in the morning may be fully exposed during the meal.
Draw the service flow first
Sketch five routes before you approve the layout:
- Guest arrival and registration.
- Bar and food queues.
- Movement to seating and entertainment.
- Restroom and first-aid access.
- Vendor unloading, replenishment, waste removal, and emergency response.
Place generators where their noise and exhaust won't affect guests or food. Position waste in a serviceable location, away from food zones and guest seating. Public-health guidance recommends avoiding animal attractions, dust, debris, excessive vegetation, and standing water around food and guest areas, while using leakproof, pest-proof, lidded waste containers. The Toronto special-event location guidance provides a useful operational reference.
Before signing, document the site with a scaled sketch, photographs, access notes, and utility information. If you're building a broader inspection process, the resource on seven key safety audit templates is useful for turning observations into assigned checks rather than leaving them as informal notes.
Line Up the Permits and Approvals Early
Permits aren't administrative clutter. Each approval protects a different part of the event. Fire officials want clear egress and safe heat sources. Health authorities want controlled food flow and sanitation. Local authorities need to understand traffic, noise, temporary structures, and public-space use.
Start with venue use or property-owner sign-off. Then check the local special-event permit, temporary food-service permit, alcohol licence, liquor-liability requirements, tent permit, fire approval, noise rules, parking plan, traffic-control plan, accessibility requirements, and any park-district or homeowners' association approval. Requirements vary by location, so confirm them with the relevant authority instead of copying another event's paperwork.
A common temporary-event approval list includes special-event permits, tent permits for structures over about 400 square feet, fire-marshal inspections, alcohol-service licences, noise variances, and parking or traffic-control plans, as outlined in this outdoor event planning and execution guide. Local thresholds can be lower, so treat the figure as a planning prompt, not a universal rule.
Prepare the documents reviewers need:
- A scaled site plan: Show tents, exits, food areas, bars, restrooms, waste, generators, parking, and emergency access.
- A food-flow diagram: Mark deliveries, preparation, handwashing, cooking, holding, service, and waste.
- A fire and egress plan: Identify extinguishers, open flames, cooking equipment, generators, and unobstructed exits.
- A traffic plan: Explain where vehicles enter, unload, park, turn, and leave.
- An accessibility plan: Show stable routes, accessible parking, seating, toilets, and service points.
- An insurance file: Keep certificates, vendor coverage, and liquor-liability documentation together.
Start permit work 60 to 90 days before the event and allow 2 to 6 weeks for review windows, based on the planning requirements in the provided industry guidance. Don't wait for final guest counts to begin. Submit the stable information first, then update authorities when changes affect capacity, structures, food service, or traffic.
For a practical overview of the compliance side, use this regulatory requirements guide while building your approval tracker.

Keep the approval file accessible to the event lead, venue contact, caterer, and production manager. A permit that exists only in someone's inbox isn't an on-site control.
Coordinate Vendors Catering Rentals and AV
At a well-run outdoor event, vendors don't arrive on the same day. They arrive in a sequence that protects the site, the food, the equipment, and the guest route.
Rental crews should arrive first. They place tables, chairs, staging, linens, tent components, and flooring on marked positions before catering vehicles need to unload. If catering arrives while rental teams are still dragging furniture through the service lane, both crews lose time and someone eventually parks in the wrong place.
Catering needs a clear handoff. Confirm the final plating or cooking schedule, holding equipment, buffet location, replenishment path, and waste route. Hot food must be held at 60°C or above, while cold food must be held at 5°C or below, with potentially hazardous food kept under temperature control during transport and service, according to outdoor food-handling guidance. Build the buffet so guests queue on one side while staff refill from a separate service aisle.
A realistic load-in sequence
The AV team follows the main rental placement, but its exact position depends on the structure and power plan. Speakers may need to be flown or mounted before tent walls are installed. The mixing board needs a rain-safe zone, and cables must be routed away from wet areas and crossing points.
Test microphones with an actual speaker, not just a tap on the grille. Check the sound from the back of the seating area, near the bar, and along the property boundary. For ceremonies and receptions, planners can also consult this practical resource on sound system advice for weddings when deciding speaker placement and coverage.
Food and AV should never compete for the same power tap without a documented load plan. Catering equipment, refrigeration, lighting, sound, charging stations, and heaters can all create conflicts when the power map is improvised.

Use one shared run-of-show document. Include arrival times, contact numbers, vehicle details, equipment lists, power sources, water access, waste responsibility, setup completion times, and the name of the person who can approve a change. Give every vendor the same version. That single document prevents the classic outdoor-event failure where three suppliers each work from a different assumption.
Design for Guest Comfort in Open Air
Guest comfort is an operational system, not a styling layer. The biggest problems usually occur at exposure points where people stop moving, including arrival queues, bar lines, buffet stations, and open-air dining.
Start with seating clusters that combine sun and shade. Guests should be able to choose rather than compete for the only comfortable table. Position shade sails, umbrellas, or canopies according to the sun angle at event time, and check whether the shade will still cover the queue when the line is longest.
Guest Comfort Fixes by Exposure Point
| Exposure Point | Main Risk | Primary Fix | Secondary Fix | Staff Action |
|---|---|---|---|---|
| Arrival queue | Heat, glare, and slow first impression | Shade the waiting route | Add visible water and clear signage | Watch queue length and redirect guests |
| Bar line | Heat, crowding, and stalled circulation | Provide overhead cover and airflow | Separate ordering from collection | Keep the line moving and remove empty glassware |
| Buffet zone | Heat, insects, and cross-contact | Use sealed covers and controlled service | Add a separate refill aisle | Monitor food protection and holding conditions |
| Open-air dining | Flies, glare, and uneven comfort | Mix shade, airflow, and protected food presentation | Offer seating choices | Check tables, waste, water, and airflow |
| Restroom route | Heat, poor lighting, and uncertainty | Mark a clear accessible path | Add lighting and regular servicing | Restock and inspect throughout the event |
People tolerate heat differently, and outdoor risk rises with exposure time, exertion, humidity, crowd density, and limited overnight relief. Mass-gathering guidance from the World Health Organization supports planning practical heat-health measures rather than relying on a generic forecast check. Put the hydration station where every major line can see it, not behind the catering tent.
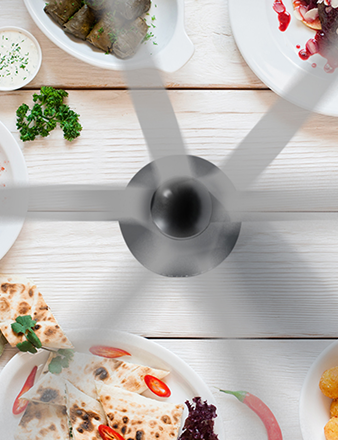
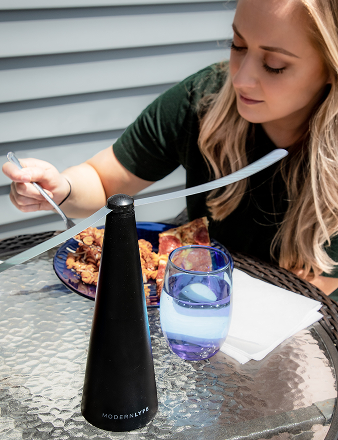
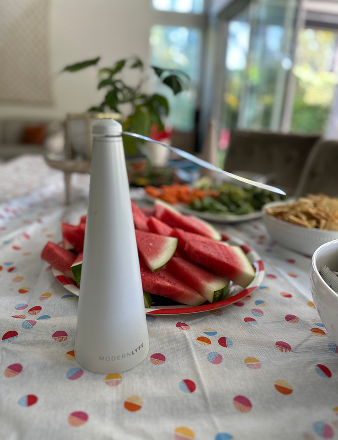
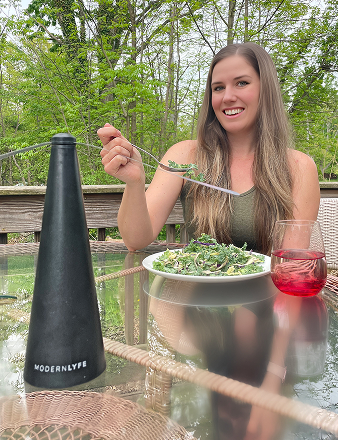
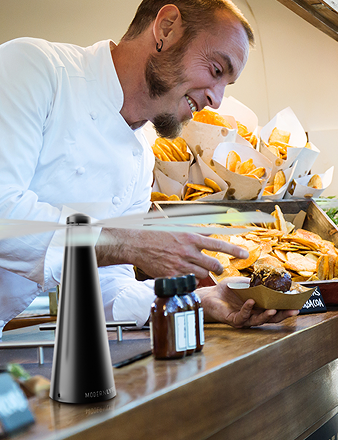
Use fans where people stand still. A fan near a buffet or bar can improve perceived comfort, but it must not blow dust, napkins, or contaminants across exposed food. Insects need the same operational attention. Keep food covered, clear plates promptly, avoid standing water, and create airflow that makes landing difficult.
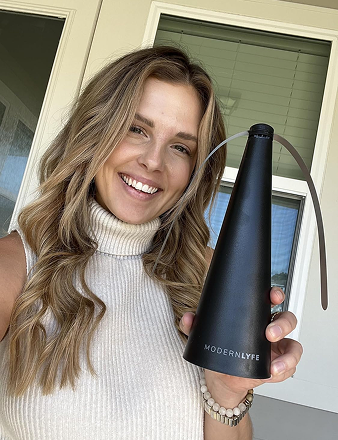
For dining layouts, position quiet table-level fly fans downwind of food so airflow pushes insects away from guests rather than toward them. MODERN LYFE battery-operated fly fans are one option for tables and buffet lines because their compact format can sit within a dining layout without becoming a visual obstruction. Use them as part of the plan, not as a substitute for sealed food, sanitation, and waste control.
Comfort failures are small, repeated, and highly visible. Fix the places where guests wait, eat, and look for help.
Portable heaters can support cool evening service, while misting fans may help during hot conditions, but both need safe placement, power, supervision, and weather limits. Keep heaters away from fabric, foliage, food packaging, and crowded routes. Keep misting equipment away from slippery walking surfaces and electrical equipment.
For permanent or semi-permanent shade options, review examples of timber shade structures and compare their installation, anchoring, appearance, and maintenance demands with temporary umbrellas or sails. The cheapest shade choice isn't always the lowest-cost choice once setup labor, wind exposure, and guest movement are included.
Print a comfort checklist for staff. Every seated group should have practical access to shade, water, airflow, restrooms, and waste service. Assign someone to inspect those points during the event instead of assuming setup quality will last.
Plan Safety Accessibility and Weather Backup
Write the response rules before the forecast becomes stressful. A weather plan that says “monitor conditions” isn't a plan. It needs a trigger, an action, an owner, and a communication method.
Begin with accessibility. Provide firm, stable pathways from accessible parking to each event zone, including food, seating, restrooms, entertainment, and first aid. Keep ramp grades under 1:12, provide accessible seating with companion seats, and make buffet surfaces reachable at 28 to 34 inches. Confirm that temporary matting won't curl, shift, or create a trip hazard.
Safety controls should be visible and easy to explain during the staff briefing:
- Emergency exits: Mark them clearly and keep them free of chairs, cases, décor, and queues.
- First aid: Place the station where staff can reach it quickly and guests can find it without confusion.
- Fire equipment: Put visible extinguishers near heat sources, cooking equipment, generators, and open flames.
- Vehicle separation: Keep arrivals and service vehicles on separate routes, with a marshal controlling movement.
- Communication: Give supervisors a simple incident protocol and a reliable way to reach the decision-maker.
Use written weather thresholds for consistency. The thresholds below are operational examples that must be checked against local authority, venue, and safety requirements:
| Trigger | Required Action |
|---|---|
| Wind above 25 mph | Inspect tents, structures, signage, loose décor, and equipment |
| Lightning within 10 miles | Halt outdoor activities and move people to the designated safe area |
| Heat index above 100 | Activate the cooling plan, expand hydration support, and reassess activity intensity |
| Steady rain with more than a 30% chance | Make the rain call 24 hours out and notify vendors and guests |
Assign one weather decision-maker and one backup. The communication chain should reach venue management, vendors, staff, performers, transport providers, and guests. Put each trigger and action on a printed sheet at check-in, in the production area, and with supervisors.

For a broader framework covering ownership, escalation, and response planning, use these risk management strategies. The aim is simple. Nobody should be deciding what “pause activities” means while guests are already standing in unsafe conditions.
Use a Ready Timeline and Checklist
A reusable checklist turns outdoor event planning from a collection of good intentions into a controlled process. Build it in a printable PDF, Notion template, or shared spreadsheet. Every row needs one owner, one due date, and one status. If a task has three owners, it usually has none.
12 to 8 weeks out
Lock the site and create the first scaled layout. Establish the budget baseline, begin permits, identify food and alcohol requirements, and record the initial weather-backup options. Confirm access for delivery vehicles, utilities, restrooms, waste removal, and emergency response.
Checklist items should include:
- Permits: Start special-event, food, alcohol, fire, tent, noise, and traffic checks.
- Site: Confirm ground, drainage, shade, utilities, access, parking, and neighboring sensitivities.
- Budget: Record venue, rentals, catering, AV, staffing, sanitation, comfort, transport, and contingency costs.
- Layout: Mark guest zones, service lanes, accessible routes, exits, restrooms, waste, and first aid.
8 to 4 weeks out
Sign vendor contracts and place rental orders. Conduct the AV walk-through, confirm power and water, test the catering route, and decide how you'll manage flies around buffet and dining areas. Write the weather thresholds and identify the decision-maker and backup.
Add:
- Vendors: Record arrival windows, vehicle details, contact people, setup needs, and waste duties.
- Rentals: Confirm tents, anchoring, flooring, tables, chairs, linens, shade, fans, heaters, and lighting.
- Food: Document holding equipment, handwashing, utensil sanitation, refill access, and temperature checks.
- Comfort: Stage shade, hydration, airflow, insect controls, signage, and restroom servicing.
Outdoor food operations should include utensil sanitation by washing in hot soapy water, rinsing in hot water, immersing in chemical sanitizer at the correct concentration, and air-drying. Temporary-event guidance also calls for a handwashing facility with warm running water, soap, paper towels, and wastewater collection, while recommending sanitizer test strips and re-sanitizing food-contact surfaces about every 4 hours for higher-risk setups, as detailed in temporary-event food-safety guidance.
4 to 1 weeks out
Confirm permits and vendor arrival times. Print signage, brief staff, rehearse the guest route, and walk the site with the latest layout. Stage a comfort kit with water supplies, shade components, fans, insect controls, towels, waste bags, cleaning materials, first-aid supplies, and backup communication tools.
Event week and event day
Distribute the final run sheet. Confirm every vendor the day before, then conduct a site sweep before guests arrive. Check pathways, exits, food temperatures, handwashing, restrooms, waste containers, lighting, power, weather conditions, and queue space.

After the event, hold a short review while details are fresh. Record where queues formed, when shade became inadequate, which vendors arrived late, how food service flowed, and whether the weather thresholds worked. Update the checklist before the next booking, so each event makes the next one easier to run.
MODERN LYFE offers battery-operated fly fans for tables, buffet lines, outdoor receptions, and backyard dining, helping planners address insect exposure without disrupting the tablescape. Visit MODERN LYFE to review practical fly-control options for your next outdoor event and build comfort into the plan before guests arrive.